OpenShift Virtualization is a powerful capability within Red Hat OpenShift that enables organizations to run and manage virtual machines (VMs) alongside containerized workloads on a unified Kubernetes-based platform. By leveraging KubeVirt, OpenShift Virtualization allows businesses to modernize their infrastructure by seamlessly integrating traditional VM-based applications with cloud-native technologies. This approach simplifies operations, enhances scalability, and provides a consistent development and deployment experience across VMs and containers, making it easier to transition to a cloud-first strategy without abandoning existing investments.
OpenShift Virtualization bridges the gap between traditional virtualization and cloud-native development by blending virtual machine (VM) concepts with Kubernetes-native workflows. Unlike conventional hypervisor-based virtualization, OpenShift Virtualization treats VMs as first-class citizens within Kubernetes, enabling them to be managed just like containers—leveraging features such as declarative configurations, automated scaling, and GitOps-driven deployments. This integration allows organizations to apply Kubernetes constructs like namespaces, operators, and persistent storage to VMs, ensuring a unified management experience. By adopting this approach, enterprises can modernize legacy applications while maintaining workload portability, improving automation, and reducing operational complexity.
Create a New Virtual Machine
We want to demonstrate this blending of VMs and Kubernetes primitives to create and manage network security constraints. Our first step is to create a new virtual machine. It’s going to be a RHEL 9 box with 1 core and 2 GB of memory. Below is the screenshot of creating the VM using the new Virtualization view within OpenShift.
To accomplish this on the command line using the VirtualMachine custom resource (CR), you can use the following manifest.
apiVersion: kubevirt.io/v1
kind: VirtualMachine
metadata:
name: rhel9-vm001
namespace: example-vm
labels:
app: rhel9-vm001
spec:
dataVolumeTemplates:
- apiVersion: cdi.kubevirt.io/v1beta1
kind: DataVolume
metadata:
name: rhel9-vm001
spec:
sourceRef:
kind: DataSource
name: rhel9
namespace: openshift-virtualization-os-images
storage:
resources:
requests:
storage: 30Gi
running: true
template:
metadata:
labels:
kubevirt.io/domain: rhel9-vm001
spec:
architecture: amd64
domain:
cpu:
cores: 1
memory:
guest: 2Gi
devices:
disks:
- disk:
bus: virtio
name: rootdisk
- disk:
bus: virtio
name: cloudinitdisk
interfaces:
- masquerade: {}
model: virtio
name: default
networks:
- name: default
pod: {}
terminationGracePeriodSeconds: 180
volumes:
- dataVolume:
name: rhel9-vm001
name: rootdisk
- cloudInitNoCloud:
userData: |-
user: cloud-user
password: Pass123!
chpasswd: { expire: False }
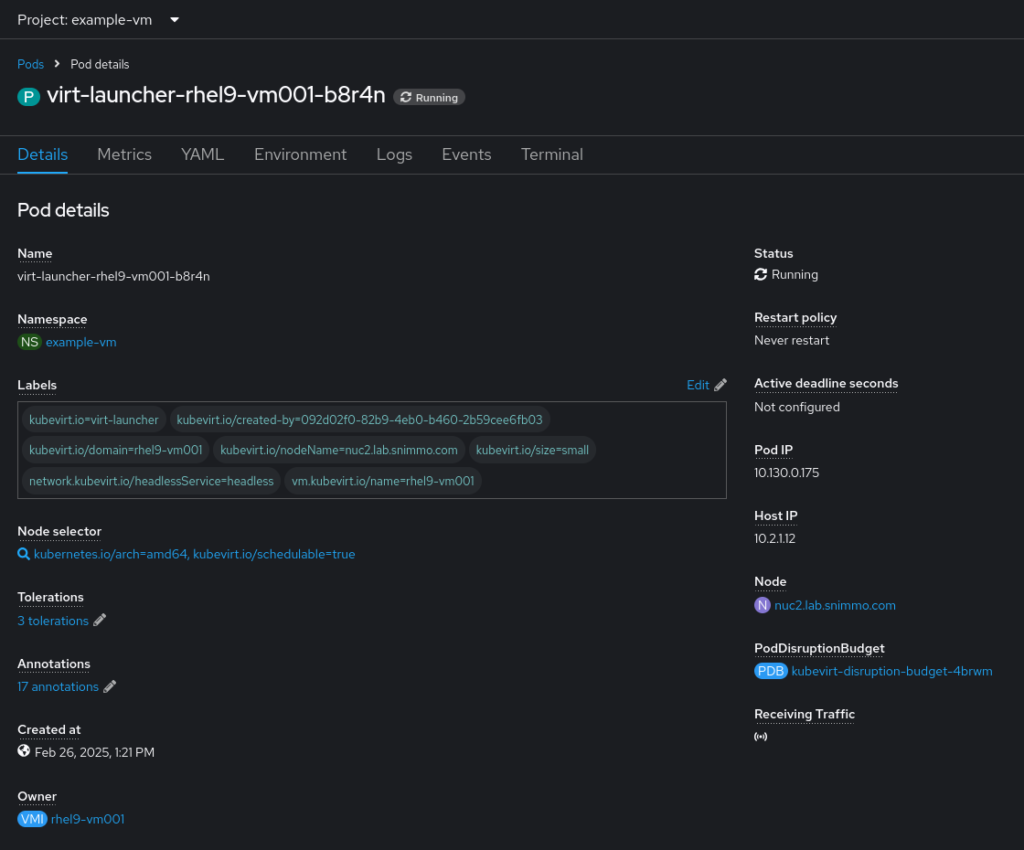
name: cloudinitdiskWhen the VirtualMachine is created, it’s actually a pod that gets created with the VM running in KVM inside the pod. You will see the new pod in the view.
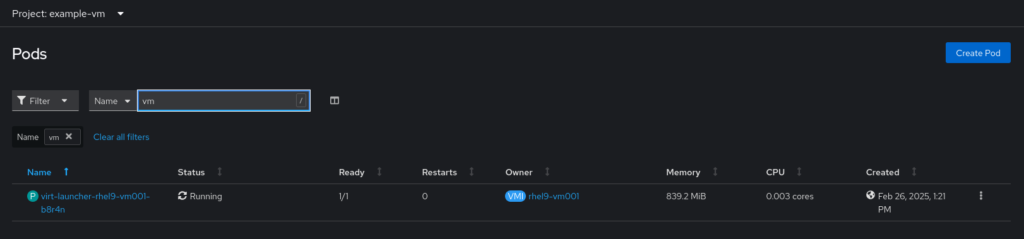
In the pod definition, the label for kubevirt.io/domain: rhel9-vm001 is copied. This label is what is actually used for the Kubernetes networking configurations, NOT the VirtualMachine CR!
Create a Web Server
Now that we have our VM running, we need to install a web server and get everything running. You can accomplish this by using the built-in console view in OpenShift.
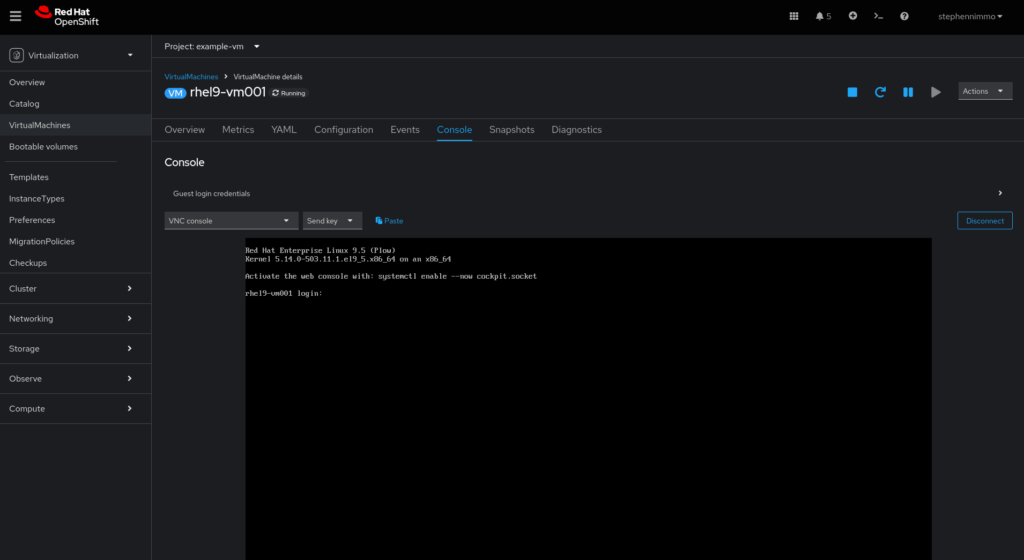
Once you log in, you can then execute the following commands to get the web server installed and running.
sudo subscription-manager register
sudo dnf update -y
sudo dnf install firewalld -y
sudo systemctl start firewalld
sudo systemctl enable firewalld
sudo firewall-cmd --permanent --add-service=http
sudo firewall-cmd --reload
sudo dnf install httpd -y
sudo systemctl start httpd
sudo systemctl enable httpd
echo "Hello from Apache on RHEL" | sudo tee /var/www/html/index.html
To test the web server locally in the console, you can use the curl command – curl http://localhost
Setup Kubernetes Networking
Now that we have a web server running in our VM, we need to setup the Kubernetes network infrastructure to create connectivity. First, we create the Service object to facilitate load balancing and cluster networking.
apiVersion: v1
kind: Service
metadata:
  name: rhel9-vm001-http-service
spec:
  selector:
    kubevirt.io/domain: rhel9-vm001
  ports:
    - name: http
      protocol: TCP
      port: 80
      targetPort: 80
Notice the selector references the label provided in the VirtualMachine definition but it actually refers to the pod label, NOT the VM. It’s a small technicality but relevant to understand that underneath all this, it’s still just Kubernetes.
The VM’s web server is now available to other workloads in the cluster using the internal DNS at rhel9-vm001-http-service.example-vm.svc.cluster.local. Now, let’s create the route to allow traffic from outside the cluster.
apiVersion: route.openshift.io/v1
kind: Route
metadata:
  name: rhel9-vm001-http-route
spec:
  to:
    kind: Service
    name: rhel9-vm001-http-service
  port:
    targetPort: http
This allows us to now access the web server from outside the cluster using the URL pattern
http://rhel9-vm001-http-route-example-vm.apps.<clustername>.<domain>
Locking Down the Network
So far, we have enabled connectivity for port 80 all the way from the external cluster ingress to the web server. There are several different layers in which network security can be interjected. We can utilize network policies to add additional network security constraints to the running workload. In Kubernetes, network policies are considered “stackable” meaning that multiple network policies can be applied to a set of pods, and their rules will be combined to form the final set of allowed connections, effectively stacking the restrictions on top of each other; this is because network policies are additive, not sequentially applied.
For our example, we will apply two policies. The first is a deny all. This policy denies all protocols on all ports, both inbound and outbound.
apiVersion: networking.k8s.io/v1
kind: NetworkPolicy
metadata:
  name: deny-all
spec:
  podSelector: {}
  policyTypes:
    - Ingress
    - Egress
These deny all policies are great for defaulting everyone and forcing administrators to create specific policies to allow specific traffic. In our case, we want http traffic inbound over port 80, so let’s add an additional policy to allow this specific traffic.
apiVersion: networking.k8s.io/v1
kind: NetworkPolicy
metadata:
  name: allow-http
spec:
  podSelector:
    matchLabels:
      kubevirt.io/domain: rhel9-vm001
  policyTypes:
    - Ingress
  ingress:
    - ports:
      - protocol: TCP
        port: 80
Again, notice the selector references the label provided in the VirtualMachine definition.
One comment
Comments are closed.