In this blog post, we are going to explore building a Quarkus application using Tekton, which is the upstream project on which OpenShift Pipelines is based on.
Understanding Tekton
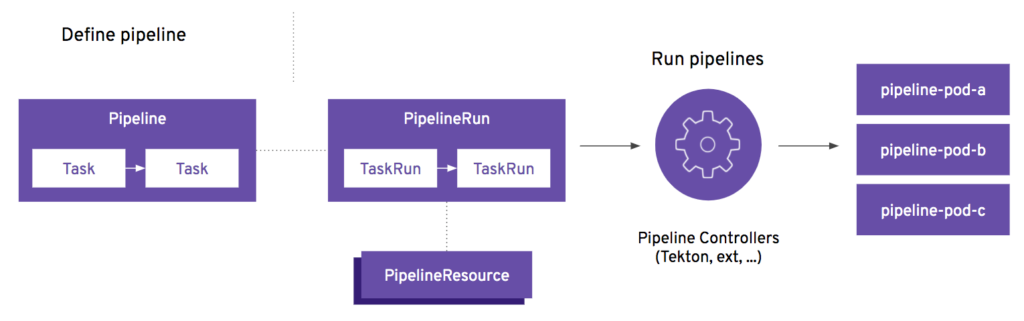
Tekton is a powerful and flexible open-source framework for creating continuous integration and continuous deployment (CI/CD) systems. Built to run on Kubernetes, Tekton abstracts the complexities of building and deploying pipelines by breaking them down into three core components: pipelines, tasks, and steps.
At the highest level, a Pipeline in Tekton defines a series of Tasks that need to be executed to achieve a CI/CD workflow. This could range from compiling code, running tests, building images, and deploying applications to production. Each Pipeline is a collection of sequential and/or parallel tasks, allowing developers to specify the order and dependencies between various stages of the build and deployment process.
A Task is a core building block within a Pipeline, representing a single unit of work. Each Task is composed of multiple Steps that define the finer-grained actions it performs. For example, a Task might involve running unit tests, and the Steps would include setting up the environment, installing dependencies, and then executing the test command. These Steps, defined using simple containers, run sequentially, enabling precise control over the actions performed.
At the runtime level, PipelineRuns and TaskRuns are dynamic execution instances of Pipelines and Tasks, respectively. They provide a way to trigger and monitor the actual execution of the defined Pipelines and Tasks, allowing for visibility and traceability of CI/CD workflows.
A PipelineRun represents the execution of a specific Pipeline, capturing all of the parameters, workspaces, and the exact sequence of TaskRuns initiated. When a PipelineRun is triggered, Tekton orchestrates the defined tasks according to the Pipeline’s specifications, handling dependencies, parallel execution, and error handling as defined. Each PipelineRun can have unique input values or configurations, enabling the same Pipeline to be used in different scenarios, such as development, testing, or production deployments.
A TaskRun is an execution of an individual Task within the context of a PipelineRun or as a standalone entity. It is responsible for running the defined steps of a Task, such as building an application, running tests, or interacting with external systems. Each TaskRun is isolated, allowing Tekton to capture logs, handle retries, and maintain a record of the execution. By analyzing TaskRuns, you can gain detailed insights into which steps succeeded, which failed, and any outputs or side effects produced during execution.
Create the Project
The project is just the “hello world” example code generated by the Quarkus CLI when creating a new project. The source can be found at https://github.com/stephennimmo/quarkus-hello and was generated using the Quarkus CLI with the following command. All of the pipeline yaml can be found in the pipeline folder in the project.
quarkus create app --wrapper \
    -x config-yaml,rest-jackson \
    com.stephennimmo:quarkus-hello:1.0-SNAPSHOT
Defining a Pipeline
For this example, the ultimate goal is to generate an container image for our application. To achieve this, we will need to perform the following steps:
- Clone the correct branch of our application’s git repository
- Run the application’s build tool, which in this case is Maven
- Create a new container image using the Containerfile definition in the repository
- Push the new container image to a centralized image repository
To accomplish these tasks, we are going to leverage some of the existing ClusterTasks defined when the OpenShift Pipelines operator is installed. However, instead of blasting forward with the entire implementation, let’s do this incrementally. We are going to start with the first desired outcome which is to have the repository cloned from source based on a push/merge event from source control, which is in this case GitHub.
Here’s the starting pipeline with a single task for performing the git clone. We are going to create a new folder in our project (pipeline) and add this yaml file first. We are also going to create a Kustomize yaml so that applying changes becomes simpler.
apiVersion: tekton.dev/v1
kind: Pipeline
metadata:
  name: quarkus-hello-build-pipeline
  labels:
    app: quarkus-hello
spec:
  params:
    - name: git-repository-url
  tasks:
    - name: git-clone
      taskRef:
        name: git-clone
        kind: ClusterTask
      params:
        - name: url
          value: $(params.git-repository-url)
      workspaces:
        - name: output
          workspace: workspace
  workspaces:
    - name: workspace
Notes:
- This Pipeline spec starts with a single task which requires a single param, which is the url for the git repository we are wanting to clone.
- We are using the git-clone ClusterTask because it’s there and it works. Don’t reinvent the wheel. One of the themes and overall struggles with building CICD tooling is the dichotomy between centralization and distribution as it relates to shared tooling.
- The workspace is also defined to allow for a place in storage to put the cloned repository. These workspaces are the shared memory spaces that are passed between tasks.
Off to a great start. Now we need to create the plumbing to trigger this pipeline via a webhook from GitHub when there is a push event on the main branch. This is where the TriggerTemplate comes into play.
apiVersion: triggers.tekton.dev/v1beta1
kind: TriggerTemplate
metadata:
  name: quarkus-hello-build-trigger-template
  labels:
    app: quarkus-hello
spec:
  params:
    - name: git-repository-url
      default: "https://github.com/stephennimmo/quarkus-hello.git"
  resourcetemplates:
    - apiVersion: tekton.dev/v1
      kind: PipelineRun
      metadata:
        generateName: quarkus-hello-build-pipeline-
      spec:
        pipelineRef:
          name: quarkus-hello-build-pipeline
        params:
          - name: git-repository-url
            value: $(tt.params.git-repository-url)
        workspaces:
          - name: workspace
            volumeClaimTemplate:
              spec:
                accessModes:
                  - ReadWriteOnce
                resources:
                  requests:
                    storage: 100Mi
Notes:
- Here’s where the PipelineRun gets generated. Basically, this trigger template defines the PipelineRun and passes in the params from the TriggerBinding.
Now that the TriggerTemplate is in place, we need something to trigger it. This is where the EventListener comes in to assist.
apiVersion: triggers.tekton.dev/v1beta1
kind: EventListener
metadata:
  name: quarkus-hello-build-event-listener
  labels:
    app: quarkus-hello
spec:
  serviceAccountName: pipeline
  triggers:
    - name: quarkus-hello-build-trigger
      bindings:
        - ref: github-push
          kind: ClusterTriggerBinding
      interceptors:
        - ref:
            name: "github"
          params:
            - name: "secretRef"
              value:
                secretName: quarkus-hello-github-webhook-secret
                secretKey: token
            - name: "eventTypes"
              value: [ "push" ]
      template:
        ref: quarkus-hello-build-trigger-template
Notes:
- The first thing to notice is the serviceAccountName defined as pipeline. When an OpenShift project is created, the pipeline service account is one of the default SAs created. We will be binding any necassary secrets to this service account for accessing protected resources, such as git repos or container repositories.
- In this EventListener, we define a single trigger. The Trigger brings together three components.
- The binding, which is defined by OpenShift Pipelines as a ClusterTriggerBinding, is where the incoming json POST from the webhook is mapped to parameters for use in the pipeline.
- The interceptor is one of the security mechanisms and uses an OpenShift Pipelines provided github interceptor that matches a Kubernetes secret with the payload’s POST header to ensure the origin of the webhook is legitimate.
- Finally, there’s the actual trigger template that is being called by the event listener.
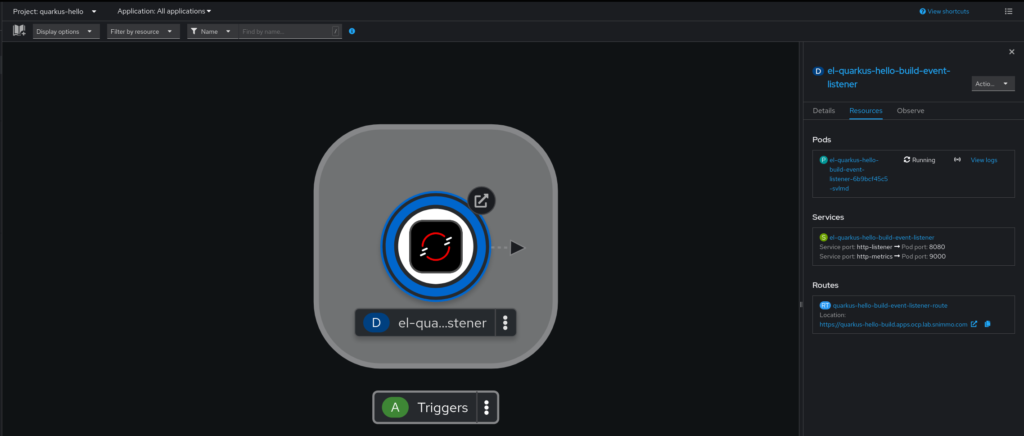
The EventListener is what spins up the endpoint resource that listens for events but we need one more step which is exposing the listener via an OpenShift Route.
apiVersion: route.openshift.io/v1
kind: Route
metadata:
  name: quarkus-hello-build-event-listener-route
  labels:
    app: quarkus-hello
spec:
  host: quarkus-hello-build.apps.ocp.lab.snimmo.com
  to:
    kind: Service
    name: el-quarkus-hello-build-event-listener
    weight: 100
  port:
    targetPort: http-listener
  tls:
    termination: edge
  wildcardPolicy: None
The final bit is the already mentioned kustomization.yml file which enumerates these resources and gives us an ease of application.
resources:
  - quarkus-hello-build-pipeline.yml
  - quarkus-hello-build-trigger-template.ymlquay
  - quarkus-hello-build-event-listener.yml
  - quarkus-hello-build-event-listener-route.yml
Go ahead and create the resources.
oc login...
oc new-project quarkus-hello
oc apply -k pipeline
After these resources are applied, the event listener should be running and waiting.
GitHub Setup
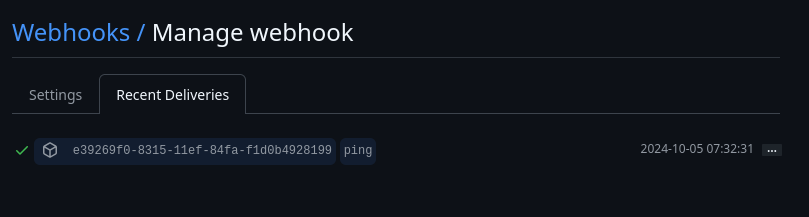
The last step to the plumbing is the setup of the webhook on the GitHub side.
- Open the code repository, go to the “Settings” tab, and then select the “Webhooks” item on the left hand menu.
- Click on the “Add webhook” button.

- Put in the URL from the Route that was created earlier.
- Make sure the “Content type” is set to “application/json” because that’s what our ClusterTriggerBinder is expecting.
- Add your super secret token for the EventListener’s interceptor configuration. We are going to create that secret in a second.
- I like to get everything sent in terms of events but you could just use the push event.
- Click “Add Webhook” and you will be good to go. It will ping your endpoint and you can check it worked.
Last step is creating the secret for the webhook secret.
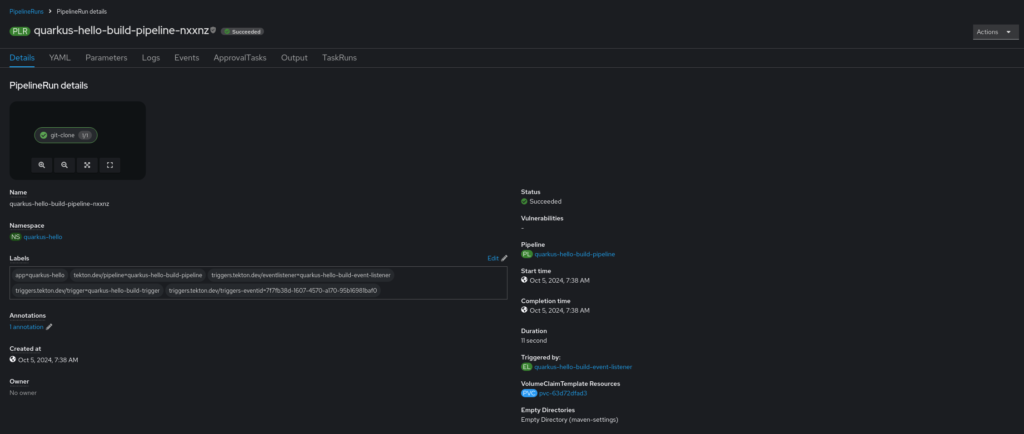
oc create secret generic quarkus-hello-github-webhook-secret --from-literal=token=********Now, make a commit to the repo and push it. You will see the pipeline kick off and everything should run as expected.
Adding the Maven Build
Now that the infrastructure is setup, let’s add the maven build step to the pipeline. Here’s the additional task yaml added to the previously defined pipeline.
apiVersion: tekton.dev/v1
kind: Pipeline
metadata:
  name: quarkus-hello-build-pipeline
  labels:
    app: quarkus-hello
spec:
  params:
    - name: git-repository-url
  tasks:
    - name: git-clone
      taskRef:
        name: git-clone
        kind: ClusterTask
      params:
        - name: url
          value: $(params.git-repository-url)
      workspaces:
        - name: output
          workspace: workspace
    - name: maven-verify
      taskRef:
        name: maven
        kind: ClusterTask
      params:
        - name: MAVEN_IMAGE
          value: 'registry.access.redhat.com/ubi9/openjdk-21:1.20'
        - name: GOALS
          value:
            - '-B'
            - '-ntp'
            - verify
      workspaces:
        - name: source
          workspace: workspace
        - name: maven-settings
          workspace: maven-settings
      runAfter:
        - git-clone
  workspaces:
    - name: workspace
    - name: maven-settings
Notes:
- The maven ClusterTask allows us to pass params for what maven image to use (Red Hat UBIs, of course)
- The GOALS param is an array which ends up allowing us to not only pass the actual maven goal, but also pass other configuration params. The -B and -ntp greatly reduces the amount of useless logging.
- There’s another needed workspace for the possibility of a custom maven settings. We aren’t doing anything custom, so we are just going to end up providing an emptyDir to the mapping. This is part of the Tekton configuration I don’t like because the emptyDir designation ends up being all the way up in the TriggerTemplate, which means we have to define and pass a bunch of stuff with no value. We should be able to just emptyDir at the task level.
- Notice the run-after piece. That’s what gives us our coordination. We don’t want to run maven until the git clone is done, right?
The only other addition is to add that emptyDir as a workspace in the TriggerTemplate
- name: maven-settings
  emptyDir: {}
Another push and now you have a built Quarkus app.
Using the Maven Version for the Image Tag
When we generate our container image for the application, we will want to tag it using the same version tag that is in our Maven pom.xml file. To accomplish this, we need a quick step that reads the pom and spits out the version. Here’s our task.
apiVersion: tekton.dev/v1beta1
kind: ClusterTask
metadata:
  name: maven-extract-project-version
spec:
  params:
    - name: pom-path
      type: string
      description: The path to the pom.xml file
      default: "pom.xml"
  workspaces:
    - name: source
      description: Workspace containing the pom.xml file
  results:
    - name: version
      description: The version read from the pom.xml file
  steps:
    - name: read-version
      image: registry.access.redhat.com/ubi9/ubi-minimal:9.4
      script: |
        cd $(workspaces.source.path)
        # Extract the version using grep and sed
        VERSION=$(grep -m1 -oP '(?<=<version>)[^<]+' $(params.pom-path))
        echo "Project version: $VERSION"
        # Write the version to the results file
        echo -n "$VERSION" > $(results.version.path)
Notes:
- We made it a ClusterTask because it’s fairly generic and could be utilized by any maven projects.
- Notice the results setup. That’s where we will be passing the information back to the main pipeline for use.
- Don’t forget to add this to the kustomization.yml!
Adding the Image Build
The last step is going to use the Buildah ClusterTask to build a new container image and push it to our quay.io repository. Let’s get those tasks added to the setup. Here’s the new complete pipeline.
apiVersion: tekton.dev/v1
kind: Pipeline
metadata:
  name: quarkus-hello-build-pipeline
  labels:
    app: quarkus-hello
spec:
  params:
    - name: git-repository-url
  tasks:
    - name: git-clone
      taskRef:
        name: git-clone
        kind: ClusterTask
      params:
        - name: url
          value: $(params.git-repository-url)
      workspaces:
        - name: output
          workspace: workspace
    - name: maven-verify
      taskRef:
        name: maven
        kind: ClusterTask
      params:
        - name: MAVEN_IMAGE
          value: 'registry.access.redhat.com/ubi9/openjdk-21:1.20'
        - name: GOALS
          value:
            - '-B'
            - '-ntp'
            - verify
      workspaces:
        - name: source
          workspace: workspace
        - name: maven-settings
          workspace: maven-settings
      runAfter:
        - git-clone
    - name: maven-extract-project-version
      taskRef:
        name: maven-extract-project-version
        kind: ClusterTask
      workspaces:
        - name: source
          workspace: workspace
      runAfter:
        - git-clone
    - name: buildah-bud-and-push
      taskRef:
        name: buildah
        kind: ClusterTask
      params:
        - name: DOCKERFILE
          value: 'src/main/docker/Dockerfile.jvm'
        - name: IMAGE
          value: 'quay.io/stephennimmo/quarkus-hello:$(tasks.maven-extract-project-version.results.version)'
      workspaces:
        - name: source
          workspace: workspace
      runAfter:
        - maven-extract-project-version
        - maven-verify
  workspaces:
    - name: workspace
    - name: maven-settings
Notes:
- We can run the maven-extract-project-version task in parallel with the maven verify task
- The buildah-bud-and-push task uses the buildah ClusterTask and we pass in the location of our containerfile definition and the image tag that we want to use.
- Notice the use of the results from the maven-extract-project-version task to use as a tag version for the image.
- Also note the runAfter having two dependencies.
Setup the Quay.io Repository
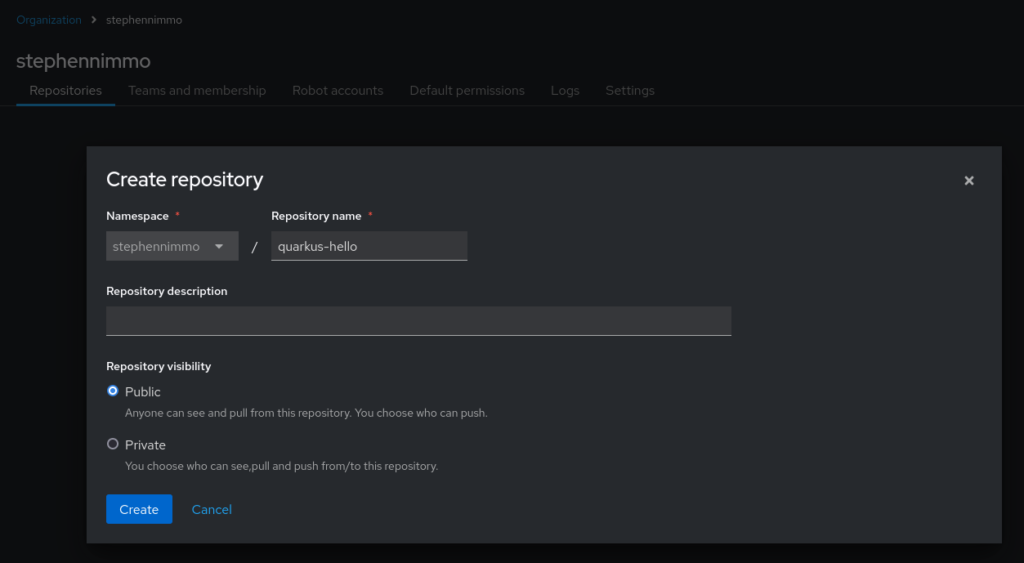
I’m going to login to my quay.io account and navigate to my target organization. Once I am there, I will click on “Create Repository” and enter the correct information.
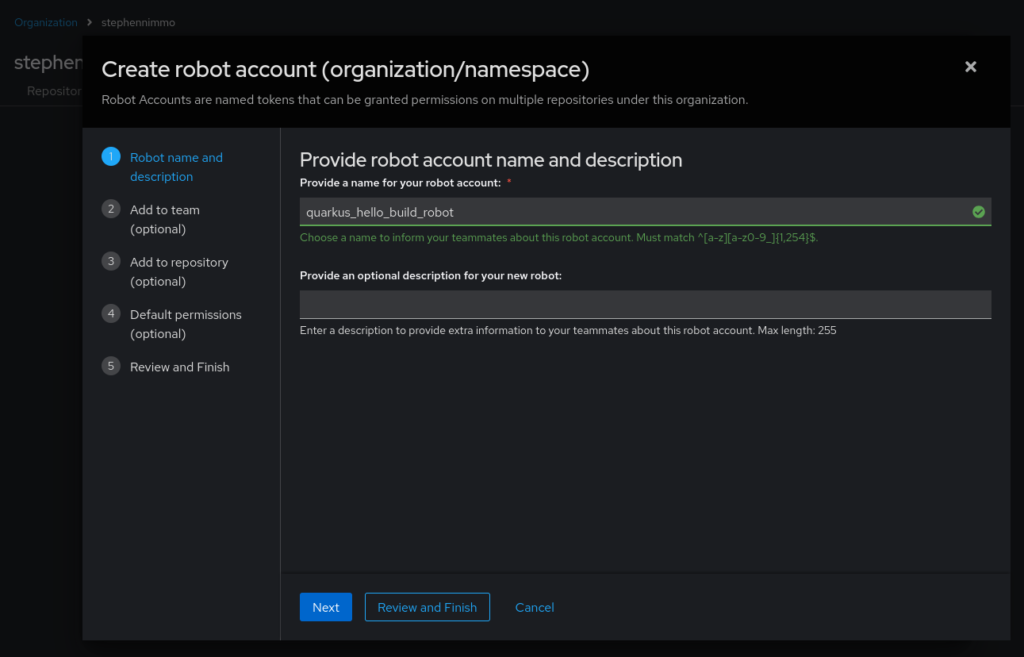
I also need to setup a robot account to allow my pipeline service account to use those credentials to push and tag new container images. In this same view, select the “Robot accounts” tab at the top and click “Create robot account”.
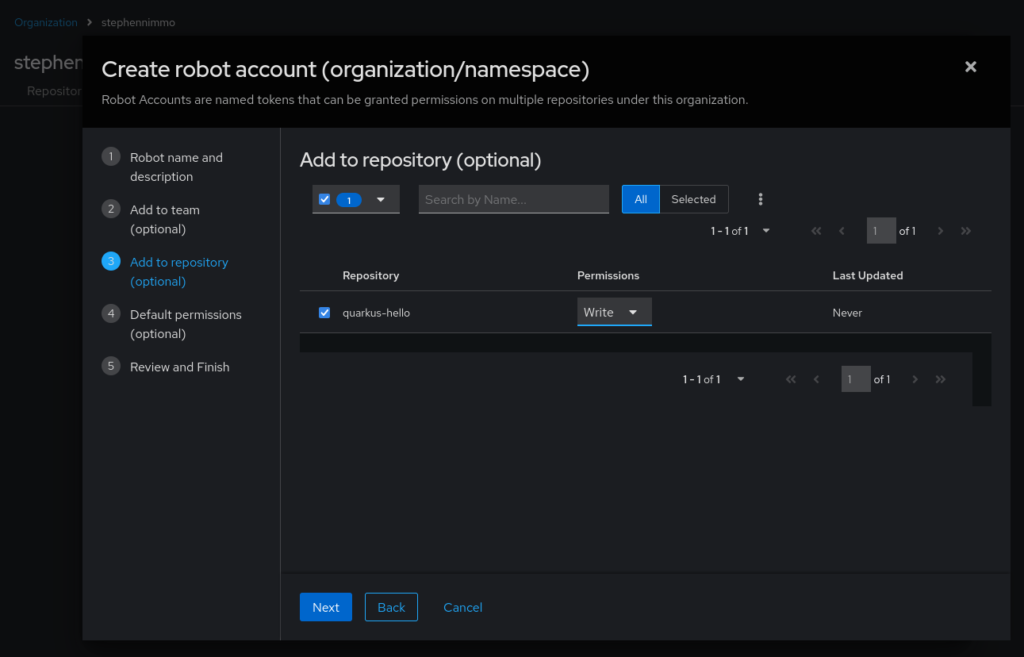
Click on the third step, Add to repository (optional), and add write permissions to the repository.
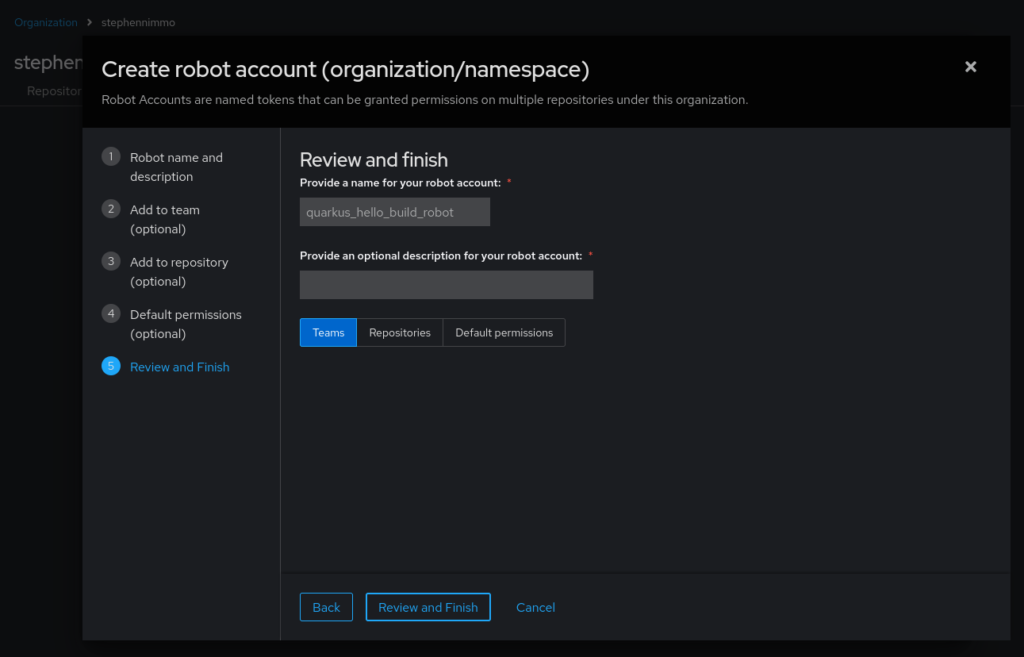
Click on step 5, Review and Finish, and click on Review and Finish button at the bottom.
This will then take you back to the Robot accounts screen.
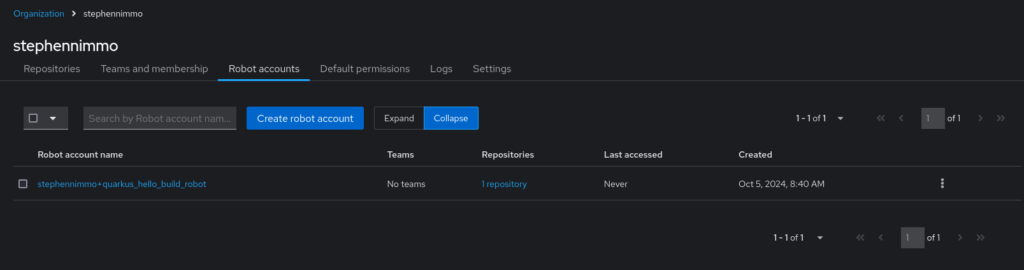
Click on the newly created account and take note of the generated token.
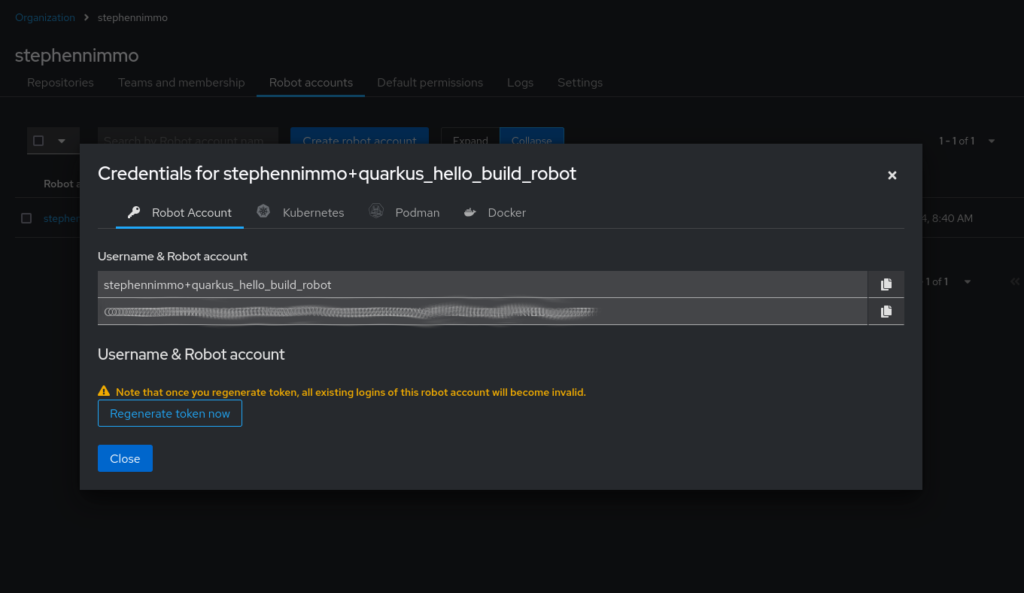
Now we need to create the secret and attach it to the pipeline service account.
apiVersion: v1
kind: Secret
metadata:
  name: quay-io-stephennimmo-quarkus-hello
  annotations:
    tekton.dev/docker-0: https://quay.io
type: kubernetes.io/basic-auth
stringData:
  username: stephennimmo+quarkus_hello_build_robot
  password: <cleartext password>
And then we add the secret to the service account
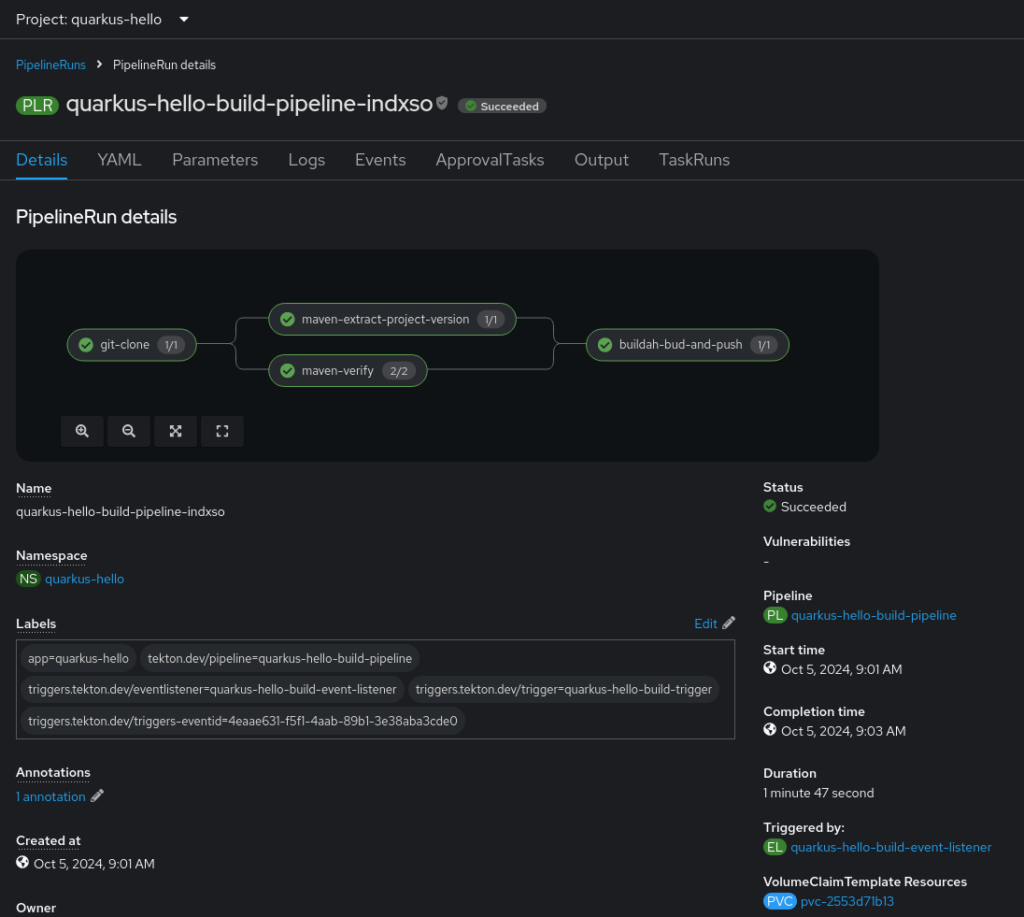
oc secrets link pipeline quay-io-stephennimmo-quarkus-hello --for=mount -n quarkus-helloPush again and we will see the entire pipeline run resulting in a newly minted container image.
References
Source: https://github.com/stephennimmo/quarkus-hello
OpenShift Pipelines: https://docs.openshift.com/pipelines
Tekton: https://tekton.dev
Quay: https://quay.io
One comment
Comments are closed.